Quick Start
Product Overview
The NeoEyes NE100 series is a high-performance smart camera product line specially designed for IoT (Internet of Things) applications. The NE101 event-triggered camera provides key functions such as scheduled image capture and data reporting. This guide will help you master the product quickly.
Hardware Preparation
Hardware Components
- NE100-MB01 development kit
- Specific module board (optional), please refer to Hardware Component Overview
Operation Guide
Device Connection
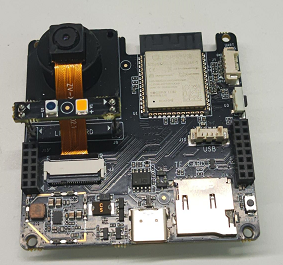
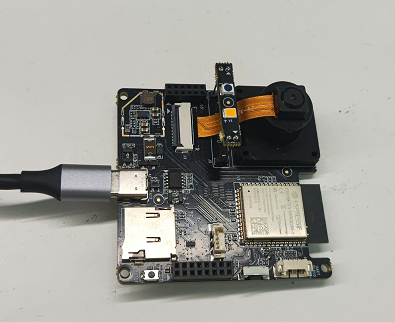
Notes:
- Powered by Type-C interface (5V/1A or above)
- The interface adopts fool-proof design
- Reserve debugging serial port (115200bps)
For detailed hardware connections, please refer to: Hardware Connection Guide
Quick Start Process
-
Power on the device
- Connect USB power
-
Confirm the status
- The power indicator light lights up for 1 second to indicate successful startup.
- System initialization takes about 1 minute.
-
Enter configuration mode
- Press and hold the function button, wait until the light turns on and then release it (about 3-4 seconds).
-
Connect to management interface
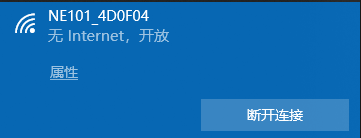
- The device hotspot name is displayed as NE101_XXXXXX
- Use mobile phone/computer to connect the device Wi-Fi
- Visit http://192.168.1.1

Core Function Configuration
Image Collection Setup
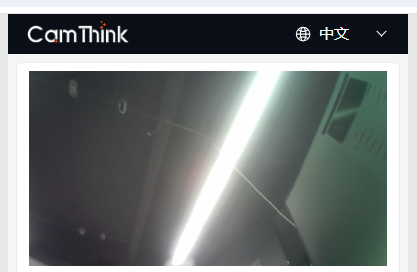
Key Parameters:
-
Flash Mode:
- Auto (default)
- Scheduled on
- Force shut down
-
Image Adjustment:
- Brightness level adjustment: 0-90.
- Image adjustment: brightness/contrast/saturation (this option is not available when using USB module).
- Screen mirroring function (this option is not available when using USB module).
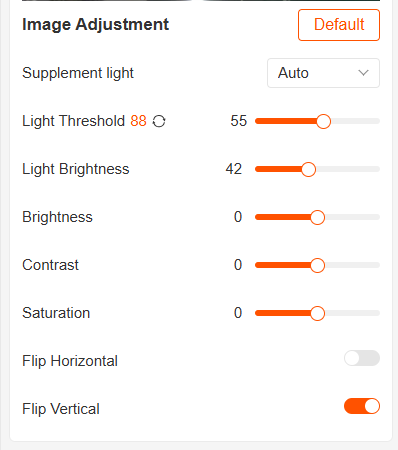
Scheduled Image Capturing Configuration

Operation Mode:
- Timer Shooting: Set a specific time point
- Interval Shooting: Set the cycle period (5 minutes-24 hours)
- External trigger mode: Triggered by PIR
- Manual Mode: Press the button to trigger shooting
Network Connection and Data Reporting
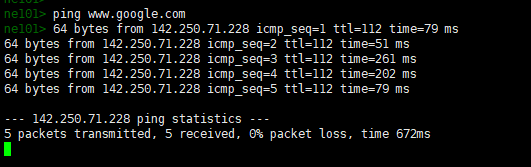
Network test (serial port connection):
# Example of ping test through serial port
ping www.example.com -c 4
Data Reporting:
- Configure MQTT server parameters
- Use MQTTX tool to verify data flow
- Check the reporting status

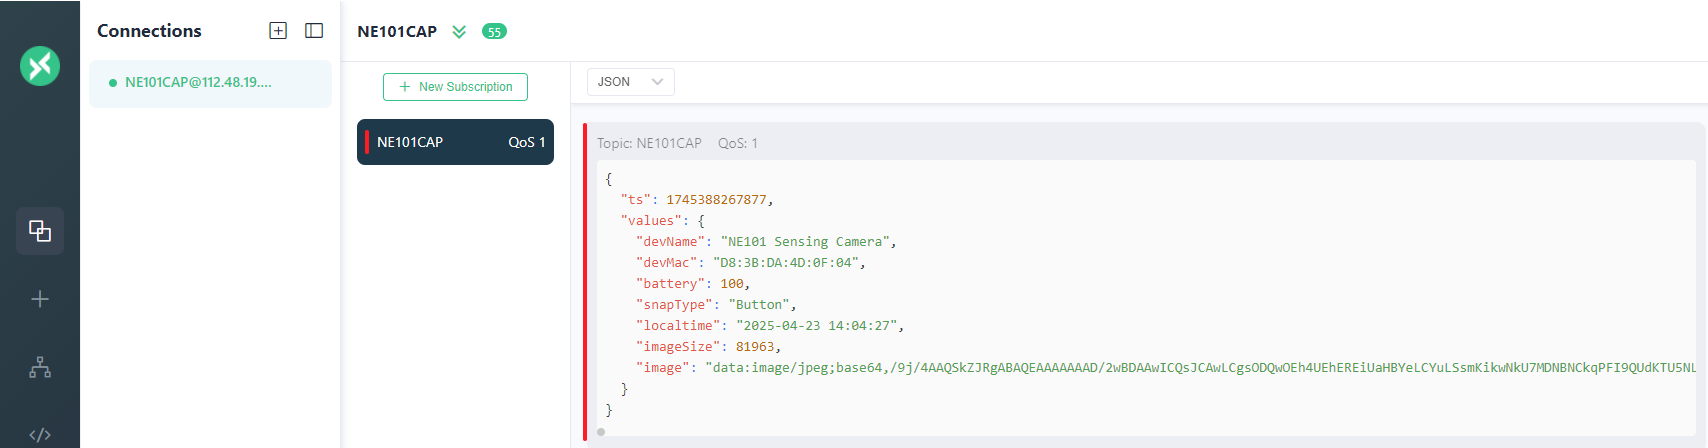
MQTTX User Manual:
-
Open MQTTX, and click
Set up new connection. -
Configure connection parameters:
- Host:Server address
xxx.xxx.xxx.xxx - Port:Server port
xxx - Client ID:Any letter, for example
mqttx-client-01 - Topic:For example
camera1 - Username / Password:Set up according to the server
- Host:Server address
-
Click connect, then subscribe Topic
camera1。
Data Format Description:
The MQTT message payload content sent by the device is in JSON format, as shown below:
{
  "ts": 1740640441620,
  "values": {
    "devName": "NE101 Sensing Camera",
    "devMac": "D8:3B:DA:4D:10:2C",
    "battery": 84,
    "snapType": "Button",
    "localtime": "2025-02-27 15:14:01",
    "imageSize": 74371,
    "image": "data:image/jpeg;base64,..."
  }
}
Field description:
ts:timestamp (milliseconds)devName:device namedevMac:device MAC addressbattery:battery level (percentage)snapType:image capture type(for exampleButton,Timer,Alarm in, etc.)localtime:local time (string format)imageSize:image size (unit: bytes)image:Base64 encoded JPEG image data, prefixed bydata:image/jpeg;base64,
Visualization Suggestion:
Use Base64 image data to quickly preview images on web pages or tools:
<img src="data:image/jpeg;base64,...">
Or paste Base64 data into Base64 Image Viewer for online preview.
Functional Verification Process
- Enter sleep mode (wait for 5 minutes to wake up automatically).
- Trigger shooting tasks (timer/manual/external trigger).
- Confirm image quality (resolution/exposure/focus).
- Verify data upload (server receives confirmation to confirm whether the received image is normal).
Detailed Explanation of Device Working Mode
| Mode | Trigger Condition | Duration | Key Features |
|---|---|---|---|
| Initialization | Power on automatically | about 1 minute | System self-test, time synchronization |
| Configuration | Press button | 1-5 minute | Configure parameters, monitor status |
| Operation | By pre-set schedule | Calculated by actual practice | Image capture, data reporting |
| Sleep mode | Automatic | By schedule | Low power consumption standby |
Premium Functions
Device Maintenance
- Hardware Reset: Press the reset button shortly to reset.
- Hardware Reset:Press the function key for 10-11s to reset all configuration.
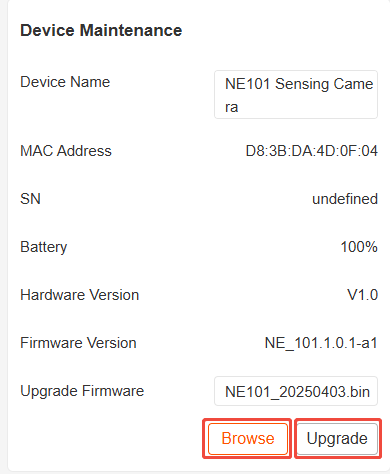
- Device Information:View the MAC address/firmware version on the management interface.
- Wireless Upgrade:Supports OTA firmware update on the management interface.
Technical Support: It is recommended to complete a full functional test for first time use.